
Changing the QLabel frameshape
-
Thanks Denni, that is a very kind offer.
The reason I started with QT Designer, is I started with a project that someone else designed using QT Designer, and I have adapted it to my needs.
I don't know Python. I have come from Arduino programming and its pretty different.I have reverse engineered the code, and made far more progress than I thought I would have in a few days.
I have some fundamental issue somewhere. I have links to the labels, tick boxes, buttons etc all working fine.
But, I just cannot get the font size to change or the ProgressBar to work.
-
GOT IT
        font = self.COMConnectLabel.font()
        font.setPointSize(14)
        self.COMConnectLabel.setFont(font)
This worked. Trial and error.
Now it I need to fix the progress bar
-
Right, the problem with the progressbar is the co-ords.
In QT Designer, it shows 480,60 20x191 as the co-ords for the Progressbar
But i declare:
    self.Temp_bar = QProgressBar(self)
    self.Temp_bar.setGeometry(480, 60, 20 , 191)
    self.Temp_bar.setValue(350)
and the Progress bar is way off the screen (so it was working - just not visible).
The actual co-ords to get it anywhere near the position in QT Designer are (502, 820, 50 , 191) And they are not exact.
Also, its going from top to bottom instead of as stated in QT Designer, and it's the wrong colour.So... have I made my own progress bar that has nothing to do with the design I made in QT Designer, or and I missing something that links them together? Hmm
Edit/update.
OK, its all incorrect. From what I understand, for some reason... all the settings in QT Designer are lost.
I would need to set up a new style sheet to reproduce the one I made in QT Designer. That seems pointless.Is there a simpler way to directly draw a progressbar style 'box' that goes vertically up the screen dependant on a variable (I know there will be... I just don't know it yet).
I do have to say the mixed/incorrect/random information about implementing these functions in QT Designer is very frustrating.
@Stevolution said in Changing the QLabel frameshape:
In QT Designer, it shows 480,60 20x191 as the co-ords for the Progressbar
But i declare:One moment: you have one progress bar in designer, but then you add one in code? Why don't you use the one from designer?
-
Right, the problem with the progressbar is the co-ords.
In QT Designer, it shows 480,60 20x191 as the co-ords for the Progressbar
But i declare:
    self.Temp_bar = QProgressBar(self)
    self.Temp_bar.setGeometry(480, 60, 20 , 191)
    self.Temp_bar.setValue(350)
and the Progress bar is way off the screen (so it was working - just not visible).
The actual co-ords to get it anywhere near the position in QT Designer are (502, 820, 50 , 191) And they are not exact.
Also, its going from top to bottom instead of as stated in QT Designer, and it's the wrong colour.So... have I made my own progress bar that has nothing to do with the design I made in QT Designer, or and I missing something that links them together? Hmm
Edit/update.
OK, its all incorrect. From what I understand, for some reason... all the settings in QT Designer are lost.
I would need to set up a new style sheet to reproduce the one I made in QT Designer. That seems pointless.Is there a simpler way to directly draw a progressbar style 'box' that goes vertically up the screen dependant on a variable (I know there will be... I just don't know it yet).
I do have to say the mixed/incorrect/random information about implementing these functions in QT Designer is very frustrating.
@Stevolution
Just to say: there is absolutely nothing wrong with using Qt Designer to design your UI, and auto-generate the Python code which implements it, as you have been doing. The code it generates is easy to understand (if you choose to look at it, you don't have to), and essentially does what you would have to do yourself if you choose to do it manually instead. Especially if you are a beginner, it can ease you into Qt programming without having to learn everything about the classes from the outset. As you have discovered, you can mix static design-time elements with dynamically-created run-time elements as you please.Plenty of other toolsets have a visual designer as well as run-time coding. It is largely a matter of personal preference which you choose to use, and there are pros & cons of each approach. Many, but not all, Qt developers use Designer. This applies whether you use C++ or Python. So feel free to follow your chosen path either way.
-
@Stevolution said in Changing the QLabel frameshape:
In QT Designer, it shows 480,60 20x191 as the co-ords for the Progressbar
But i declare:One moment: you have one progress bar in designer, but then you add one in code? Why don't you use the one from designer?
Well this is what I am trying to learn. This is my first Python code attempt!
How do I access the one I designed in QT Designer? Googling shows examples such as the one I posted/used, but as you say... I think I have made another progress bar, rather than manage to access the one I made in QT Designer.
My QT Designer progress bar is called Temp_bar, so I am not sure why it is not accessing it.
If I don't state the setGeometry, then I cannot see any ProgressBar -
@Stevolution
Just to say: there is absolutely nothing wrong with using Qt Designer to design your UI, and auto-generate the Python code which implements it, as you have been doing. The code it generates is easy to understand (if you choose to look at it, you don't have to), and essentially does what you would have to do yourself if you choose to do it manually instead. Especially if you are a beginner, it can ease you into Qt programming without having to learn everything about the classes from the outset. As you have discovered, you can mix static design-time elements with dynamically-created run-time elements as you please.Plenty of other toolsets have a visual designer as well as run-time coding. It is largely a matter of personal preference which you choose to use, and there are pros & cons of each approach. Many, but not all, Qt developers use Designer. This applies whether you use C++ or Python. So feel free to follow your chosen path either way.
Where is the code it generates?
-
Well this is what I am trying to learn. This is my first Python code attempt!
How do I access the one I designed in QT Designer? Googling shows examples such as the one I posted/used, but as you say... I think I have made another progress bar, rather than manage to access the one I made in QT Designer.
My QT Designer progress bar is called Temp_bar, so I am not sure why it is not accessing it.
If I don't state the setGeometry, then I cannot see any ProgressBar@Stevolution
I don't know what you called your design-time progress bar, but you go:self.Temp_bar = QProgressBar(self)As @jsulm said, here you are simply creating your own dynamic, run-time progress bar. If you already have one from designer you should use that one, no
... = QProgressBar(self)in your own code.For the code it generates:
-
I see you have
from PyQt5.uic import loadUi. So I'm thinking you have chosen not to generate code, you just load the.uidynamically at run-time vialoadUi(). In that case, no Python code is being generated, so there is no source code to look at. -
You could change to using
pyuic5, which you run whenever you change the Designer.uifile content to generate a Python class code from it. In that case, you would find it creates a file namedui_form.pyin your source folder where yourform.uifile is.
Have a read of e.g. https://stackoverflow.com/a/52471945/489865 for the pros & cons of each.
See https://www.riverbankcomputing.com/static/Docs/PyQt5/designer.html for the various choices.
So to summarise, you have 3 choices for how to do your UI code:
-
Do not use Qt Designer, write the code yourself manually to create widgets dynamically at run-time.
-
Use Designer to generate a
.uifile. UsePyQt5.uic.loadUi()to load that file dynamically at run-time. No Python code is auto-generated. -
Run PyQt5's
pyuic5executable on the.uifile, generating aui_....pyfile with a class/member variables for the elements.importthis.pyfile into yours and access the class methods/variables.
-
-
OK. Thank you. self.Temp_bar = self.ui.Temp_bar brought the Progressbar up that I designed immediately.
This is the part I have been struggling with, as I have found the wealth of information regarding these features on the web... difficult to wade through at best.
Still learning, but you guys have been super helpful. Thank you for your valuable time
-
I import 6 values from a separate Python routine that obtains the serial data from my Arduino (it's a pan/tilt camera with fake gun)
self.current_tilt = 0 # Current tilt (info received from arduino and displayed in LCD numbers)
self.current_pan = 0 # Current pan (info received from arduino and displayed in LCD numbers)
self.ammo_value = 0 # Ammo value (info received from arduino and displayed in LCD numbers)
self.time_value = 0 # Time at 100% (info received from arduino and displayed in LCD numbers)
self.tmp_value = 0 # Temp level (info received from arduino and displayed on ProgressBar)
self.rpm_value = 0 # Rounds per minute (info received from arduino and displayed on ProgressBar)If I print these imported values, they print out fine and track the changing values as they arrive from the Arduino.
print(self.current_pan)
print(self.current_tilt)
print(self.ammo_value)
print(self.time_value)
print(self.tmp_value)
print(self.rpm_value)However, when I go to use these variables, two of them are causing an issue.
self.Pan_LCD.display(self.current_pan) # All these values are retrieved in Comm_ard.py
self.Tilt_LCD.display(self.current_tilt)
self.Ammo_LCD.display(self.ammo_value)
self.Time_LCD.display(self.time_value)
self.Temp_bar.setValue(self.tmp_value)
self.Rounds_bar.setValue(self.rpm_value)The top 4 LCD.display lines work fine. But, the bottom 2 updates for the ProgressBar create an exception error (Error split data : 6) in the Comm_ard.py routine.
I don't understand how it can print the correct variable, yet using it causes a problem?
If I use one of the 2 troublesome variables in the LCD update lines instead... it works. So that leads me to believe that all the variables are fine and this is an update to the ProgressBar problem.
Could it be a timing issue? (messing up the serial comms). Edit. Checked this.... don't think so
-
Ah the joys of programming...
For some reason, it needs to be stated as an int:
self.Temp_bar.setValue(int(self.tmp_value))
This works
-
Ah the joys of programming...
For some reason, it needs to be stated as an int:
self.Temp_bar.setValue(int(self.tmp_value))
This works
@Stevolution
I was about to tell you this :)Ah the joys of programming...
This is (probably) from the "joys" of programming in Python. Unlike, say, C++ it's not a rigorously typed language, and that can lead to problems with type conversion.
I'm not sure why it did not implicitly convert your
self.tmp_valuetoint, you would have to show exactly what was inself.tmp_value. And I don't know how/why calling aQProgressBar.setValue()seems to cause an issue in some arduino code. -
Yes it is odd. They are all ints.... counting in 1's from 0. Doesn't seem to matter to the LCD lines, but the ProgressBar complained.
-
Forgive the varying questions, but they are on a theme (as in - same project).
I want to flash a Qlabel on and off. How can I achieve that? (I know the code to actually make it go on and off)
I tried Qtimer, but my routine really doesn't like that. Probably my bad implementation of it.
My (probably bad) idea was:
def LowAmmo(self):

    if (int(self.ammo_value<50)) and (self.is_connected):
        self.Ammo_flash +=1

        if self.Ammo_flash == 50:
             self.Critical_centre.setStyleSheet("QLabel {background-color: black; color: rgb(255, 209, 42);}");
             self.Critical_border.setFrameShape(QFrame.NoFrame)

        elif self.Ammo_flash>100:
            self.Ammo_flash = 0
            self.Critical_centre.setStyleSheet("QLabel {background-color: rgb(255, 209, 42); color: black;}");
            self.Critical_border.setFrameShape(QFrame.Box)
Trouble is, what calls self.LowAmmo() ? This routine never gets checked.
If I throw this code in somewhere else (like the routine where it displays the ammo value on the LCD), it throws up this damn Error split data : 6 error again.Still don't understand that error or what creates it
tried Qtimer, but my routine really doesn't like that. Probably my bad implementation of it.
Trouble is, what calls self.LowAmmo() ? This routine never gets checked.You do indeed need to use
QTimerto callLowAmmo()periodically. -
Thanks. That is what I have done.
Also worked out the issue with the Split data error... Int issue somewhere else -
Just like to finish off this thread by saying thank you for all the assistance.
By reverse engineering the project I found online, I have managed to far exceed my expectations of my first attempt at Python.
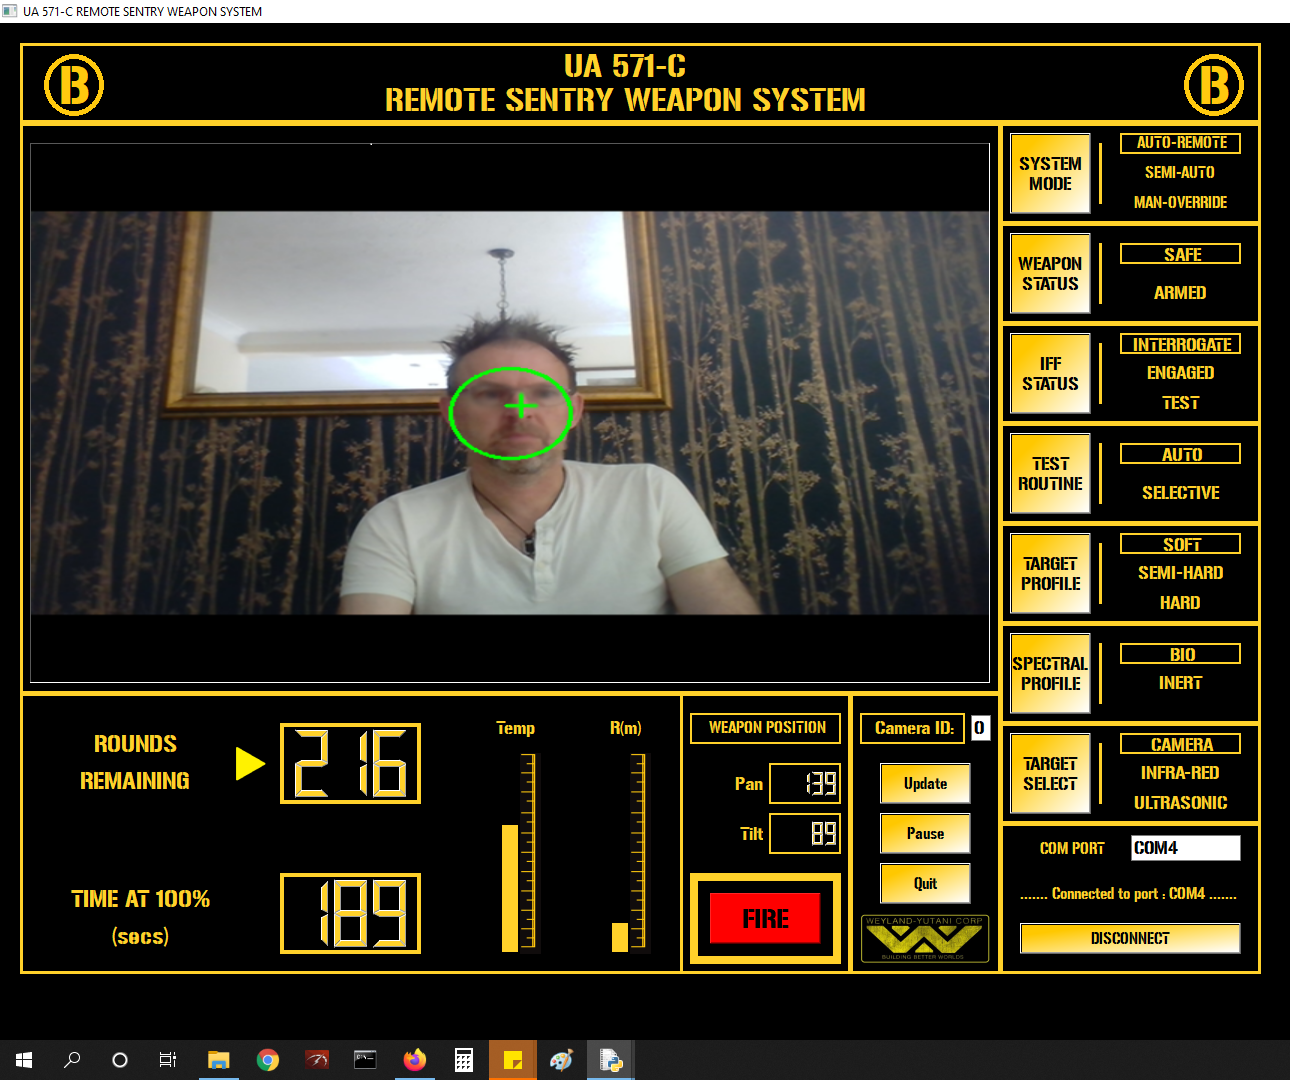
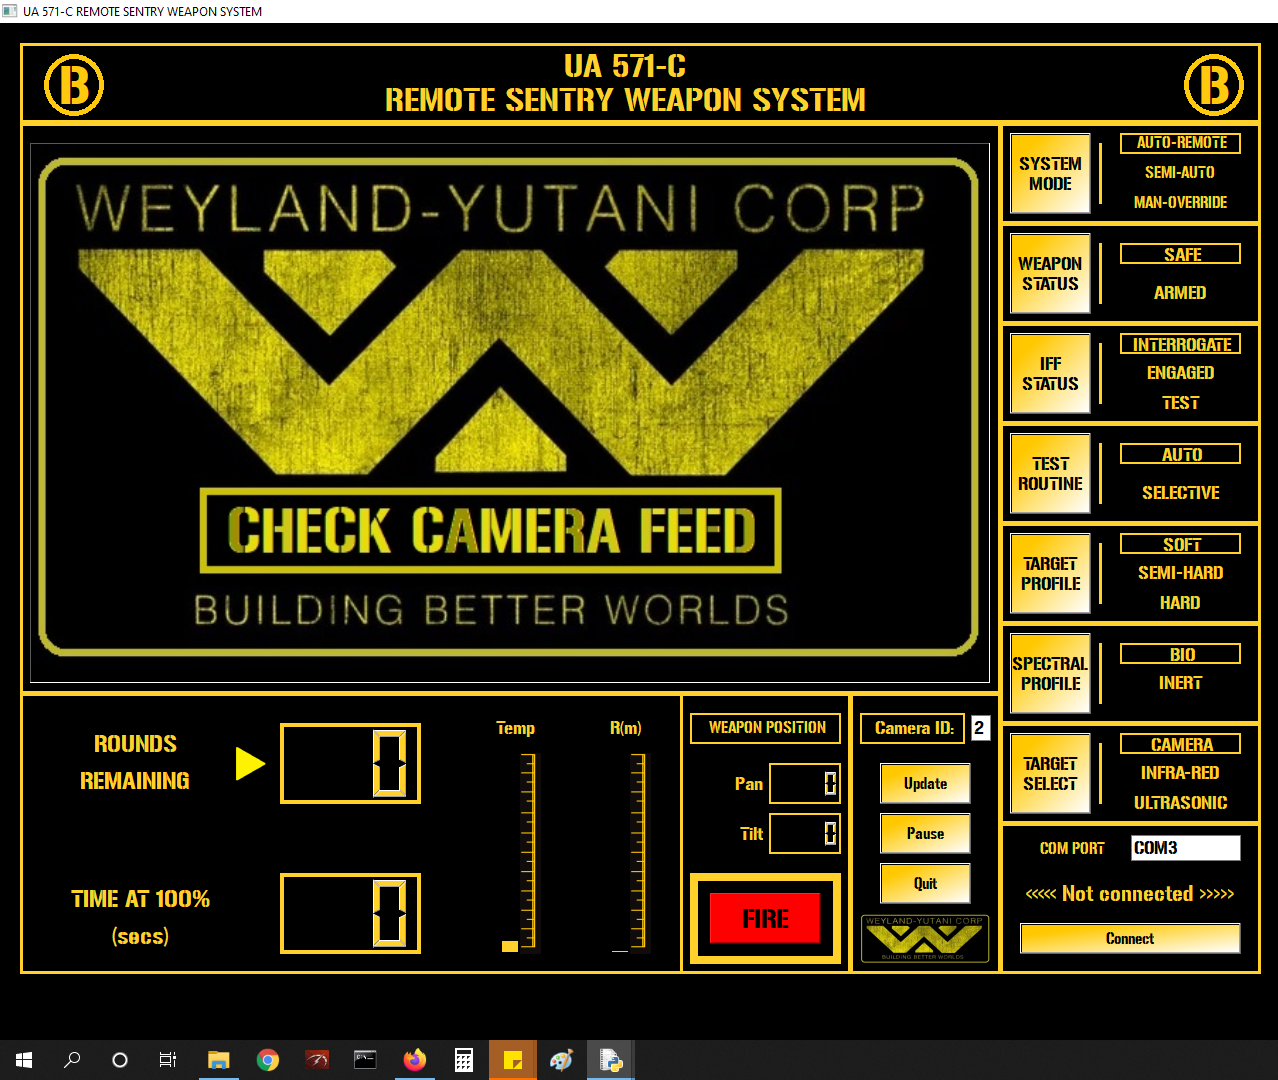
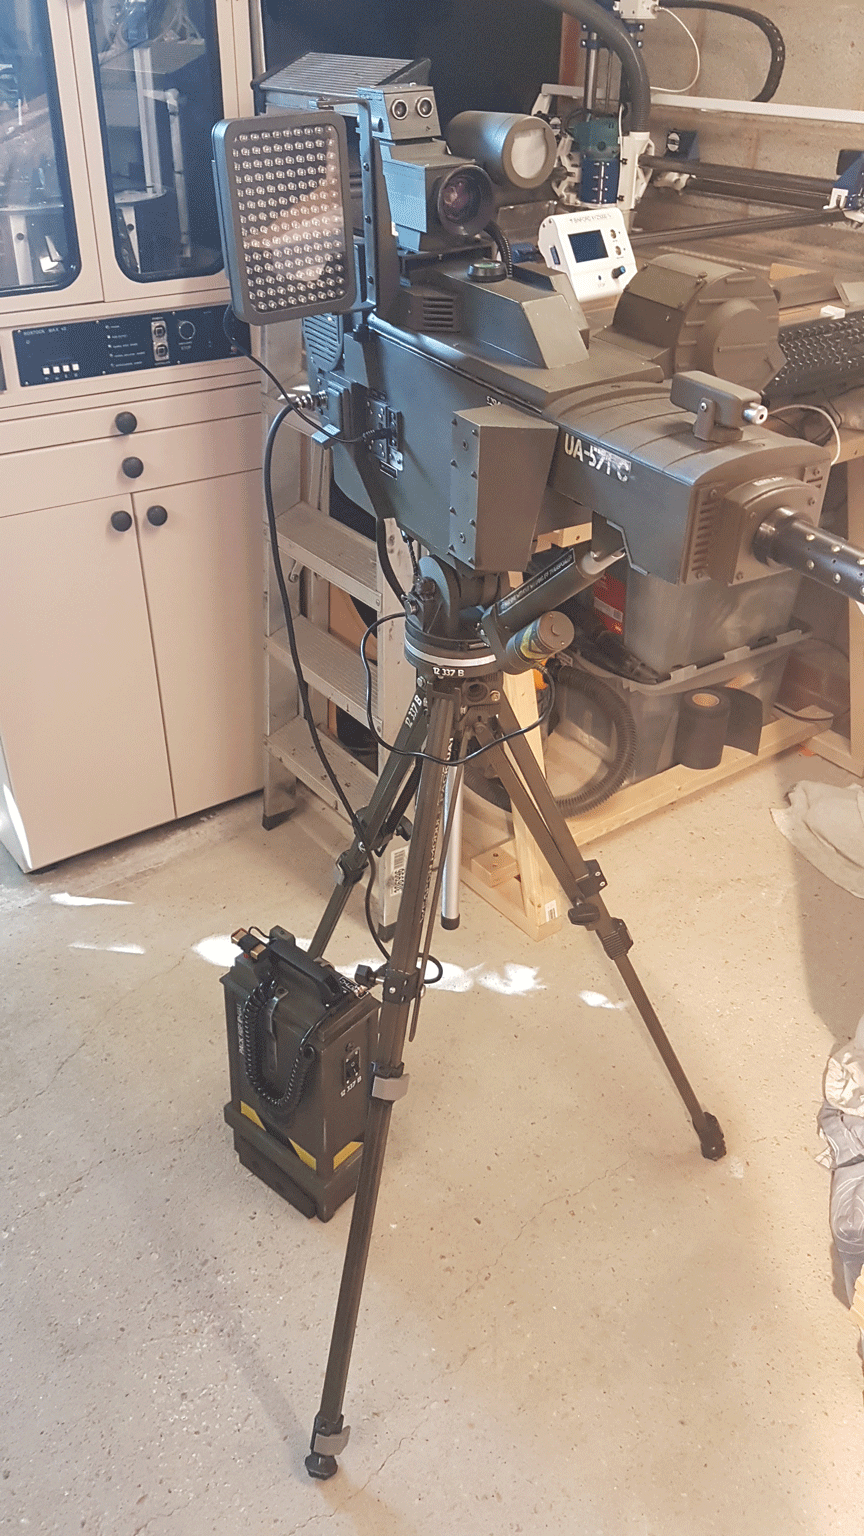
I found a camera tracking .py, and used that as a basis. Hardly any of that original code left now.LONG way to go learning Python, but I now have a working GUI, that communicates with a webcam input, and my Arduino project (Replica of the Sentry gun from Aliens).
Nice to be part of a forum where people assist rather than criticize.
The project.. The Sentry gun has full pan & tilt, controlled by the Python camera looking for a face. Gun pans while searching for target (camera is mounted on the gun). Tracks and fires when locked on (very bright barrel leds, smoke and SFX when firing).
Got the range of the webcam up to 15m using a lens.
Also has full control from the PC, 10m PIR sensor, Ultrasonic for close range etc.Gotta do something during lockdown!

-
Just like to finish off this thread by saying thank you for all the assistance.
By reverse engineering the project I found online, I have managed to far exceed my expectations of my first attempt at Python.
I found a camera tracking .py, and used that as a basis. Hardly any of that original code left now.LONG way to go learning Python, but I now have a working GUI, that communicates with a webcam input, and my Arduino project (Replica of the Sentry gun from Aliens).
Nice to be part of a forum where people assist rather than criticize.
The project.. The Sentry gun has full pan & tilt, controlled by the Python camera looking for a face. Gun pans while searching for target (camera is mounted on the gun). Tracks and fires when locked on (very bright barrel leds, smoke and SFX when firing).
Got the range of the webcam up to 15m using a lens.
Also has full control from the PC, 10m PIR sensor, Ultrasonic for close range etc.Gotta do something during lockdown!
@Stevolution said in Changing the QLabel frameshape:
Wow! :)
The Sentry gun has full pan & tilt, controlled by the Python camera looking for a face. Gun pans while searching for target (camera is mounted on the gun). Tracks and fires when locked on (very bright barrel leds, smoke and SFX when firing).
This is good, shooting looters automatically sounds fun. However, I'm not sure Qt's LGPL licence allows you to use it for murder...