Skip to content
  • Categories
  • Recent
  • Tags
  • Popular
  • Users
  • Groups
  • Search
  • Get Qt Extensions
  • Unsolved
Collapse
Brand Logo
  1. Home
  2. Qt Development
  3. Qt for Python
  4. How to use QDesignerCustomWidgetInterface.registerCustomWidget()
Forum Updated to NodeBB v4.3 + New Features

How to use QDesignerCustomWidgetInterface.registerCustomWidget()

Scheduled Pinned Locked Moved Unsolved Qt for Python
6 Posts 2 Posters 455 Views
  • Oldest to Newest
  • Newest to Oldest
  • Most Votes
Reply
  • Reply as topic
Log in to reply
This topic has been deleted. Only users with topic management privileges can see it.
  • S Offline
    S Offline
    shadow3d
    wrote on last edited by
    #1

    Hi there,
    I want to design a custom number keyboard and register it to pyside6-designer by registerCustomWidget(), so I can reuse it whenever possible.
    I have referred to the example Task Menu Extension Example and the document Custom Widgets in Qt Widgets Designer.
    But I still can understand how to do it.
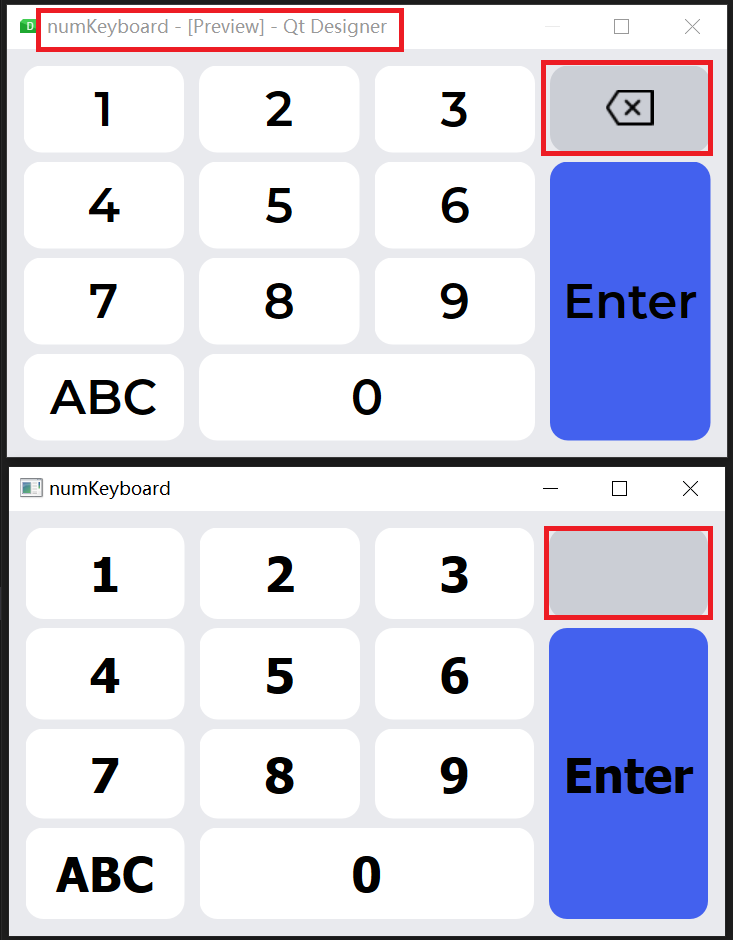
    I have already tried:

    $ python registertictactoe.py
    class QPyDesignerCustomWidgetCollection *__cdecl QPyDesignerCustomWidgetCollection::instance(void): Cannot find QCoreApplication instance.
    $ 
    

    I want to know how to realize the following effect:
    cc6d0a88-57ee-489b-b3d6-0f5c27e17fc9-image.png
    Is there some step-by-step document that can be referred to?
    Thanks

    1 Reply Last reply
    0
    • F Offline
      F Offline
      friedemannkleint
      wrote on last edited by
      #2

      The key point is setting the environment variable PYSIDE_DESIGNER_PLUGINS as explained in https://doc.qt.io/qtforpython-6/tutorials/basictutorial/uifiles.html#designer-custom-widgets .

      S 1 Reply Last reply
      2
      • F friedemannkleint

        The key point is setting the environment variable PYSIDE_DESIGNER_PLUGINS as explained in https://doc.qt.io/qtforpython-6/tutorials/basictutorial/uifiles.html#designer-custom-widgets .

        S Offline
        S Offline
        shadow3d
        wrote on last edited by
        #3

        @friedemannkleint
        Thanks for your important information.
        Now I can register my custom widget.
        However, I want to organize multiple custom widgets gracefully as here: pyside_plugins.
        Now the NumKeyboard (first custom widget) delete picture can't display.
        9da6f3ef-d0d8-4d46-b4ef-4cf1271395b0-image.png
        I have tried importing the Icon by file or resources, but neither works.
        Could you help me, thank you.

        1 Reply Last reply
        0
        • F Offline
          F Offline
          friedemannkleint
          wrote on last edited by friedemannkleint
          #4

          Have you imported the rc_file generated from .qrc? See fex in examples:

          import rc_rhiwindow

          or similar (see https://doc.qt.io/qtforpython-6/tutorials/basictutorial/qrcfiles.html#tutorial-qrcfiles )

          S 1 Reply Last reply
          0
          • F friedemannkleint

            Have you imported the rc_file generated from .qrc? See fex in examples:

            import rc_rhiwindow

            or similar (see https://doc.qt.io/qtforpython-6/tutorials/basictutorial/qrcfiles.html#tutorial-qrcfiles )

            S Offline
            S Offline
            shadow3d
            wrote on last edited by
            #5

            @friedemannkleint
            Yes, the rc_file is imported automatically by NumKeyboard_ui.py when i use the image from resources,

            S 1 Reply Last reply
            0
            • S shadow3d

              @friedemannkleint
              Yes, the rc_file is imported automatically by NumKeyboard_ui.py when i use the image from resources,

              S Offline
              S Offline
              shadow3d
              wrote on last edited by
              #6

              @friedemannkleint
              Yes, the rc_file is imported automatically by NumKeyboard_ui.py when I use the image from resources,

              Edit:
              After I modify the "*_ui.py" generated by pyside6-uic:

              # import resources_rc
              from . import resources_rc   # change to relative import.
              

              The custom widget works well in Designer.

              1 Reply Last reply
              0

              • Login

              • Login or register to search.
              • First post
                Last post
              0
              • Categories
              • Recent
              • Tags
              • Popular
              • Users
              • Groups
              • Search
              • Get Qt Extensions
              • Unsolved